Don’t slay the Golden Dragon

The thought of visiting hotel restaurants, by and large fills me with indifference. It really is a misfortune that I happen to have eaten in one too many. This is actually all a numbers game and the hotel’s core business revolves around selling rooms, so the restaurant is just an add-on intended for the deer caught in the headlights. Your flight was delayed, you’re exhausted after a 12-hour journey, you’re absolutely famished and who cares about sifting through reviews of all those local eateries that you’ve bookmarked. You’ve been eating plastic airline meals all day and now as a matter of urgency, you’re hankering for a gratifying dinner anywhere. In your somnambulant trance, you’ll happily pay for a second class, overpriced meal and in your desperate state you have passed the point of caring. Sound familiar?

But then there are those hotel restaurants that break the mould and leave you reminiscing long after you’ve left. Mumbai’s iconic grande dame, the Taj Mahal Palace exudes elegance, sophistication and colonial charm. This majestic landmark was built by the industrialist Jamshetji Nusserwanji Tata during the days of the British Empire, in response to his humiliation of being turned away by another Mumbai institution for being Indian, so the story goes. This hotel overlooking the Arabian Sea and subsequently the Gateway of India is a monument to commemorate the landing of King George V and Queen Mary on the waterfront at Apollo Bunder and opened its doors in 1903. It’s had its fair share of adversities and during World War I was converted into a military hospital.

One November night in 2008 saw one of the most violent terrorist attacks in Mumbai’s history, with armed terrorists storming the hotel, turning uber luxury into a war zone, causing untold damage. Moving on from these difficult times, the hotel has displayed a resilience that knows no bounds and its restoration has elevated the hotel into a historical monument. For Mumbaikers, the attack on the hotel was personal and tantamount to it being in their own homes, so in the aftermath, they remain very protective.

When negotiating the streets of Mumbai, you encounter an unabbreviated sensory overload. The street food hawkers present a dizzying array of choices and the stalls are ubiquitous. It’s a mecca for street food and everyone from local workers to food fashionistas will go to snack on the addictive Pani Puri, a fried hollow semolina shell, filled with crushed chickpeas and spicy water creating a flavour explosion for your palate. Mumbai’s streets are congested with traffic, vociferous headache-inducing honking, which is chaotic and overwhelming. Coming towards the Gateway of India and seeing the iconic Florentine-esque red dome atop the hotel which has now become a symbol of Indian pride, I’m overcome with a warm, familiar feeling, fuelled with euphoria. This hotel has created a wealth of childhood memories for me. I would watch as a young girl, with my face pressed up against the window, from the Sea Lounge, (famed for its afternoon tea), the ferries bobbing up and down on the sea, transporting boatloads of tourists to and from Elephanta Island. My parents would elegantly sip tea, pinky out, contrasted to my disregard for etiquette, which would lead me to run up and down the grand cantilever staircase.

Returning to the hotel after decades, post the 2008 attack, creates a mishmash of emotions. I’m drawn to the redness of the painting behind the reception in the lobby, which miraculously survived the attack unblemished. It is a triptych by M.F. Husain, the prolific modern Indian artist, entitled Three stanzas of the New Millennium. The hotel is steeped in history, where royalty, politicians, Bollywood and Hollywood celebs, visitors and locals all rub shoulders. Every corridor is graced with artwork, but the most poignant is the minimalist marble memorial inscribed with the thirty-one names of the fallen.

My mission, should I choose to accept, is to drop in on one of the restaurants, The Golden Dragon, which in my opinion is the proverbial jewel in the hotel’s crown. Patrons of this Mumbai stalwart have been feasting here since 1973, myself included. The restaurant has delighted several generations of my family and is where many of our personal milestones were celebrated. The Golden Dragon’s new avatar, may not have the swanky aura of the hotel’s Wasabi by Morimoto, which has put Japanese food onto India’s gastronomic map, but it’s like an old friend who you meet after years and just carry on from where you left off, as if there has never been any time lag. I am greeted by the imperial golden dragon at the entrance and without further ado, the Taj hospitality comes into full force and I’m seated seamlessly. Unequivocally, the restaurant designed in tones of gold and ivory, now has a more contemporary vibe, with a new live kitchen which makes great viewing of this culinary theatre. Millennials are dotted all around the room, pausing proceedings to photograph each dish as it arrives, deftly reorganising the table setting, adding cocktails, appetisers and cutlery, just for that perfect instagrammable shot. And woe betide anyone who tries to dive in for the first bite before the snap is taken.

The Dragon, as it’s affectionately known by its established clientele, has a staggeringly impressive menu, lovingly curated by bona fide expat chefs. My default of wanting to order everything on the menu kicks in. The signature dishes, song of the dragon cooked in a bamboo basket with blistering fiery chillies, beggar’s chicken (which requires 24 hours notice), wrapped and baked for hours on end, konjee crispy lamb, scorching on cast iron, are to die for and should really come with a health warning.  You can’t come to Mumbai and not experience the local jewel of the sea, so the pan-fried pomfret with Szechuan chillies and soya is a must and totally steals the headlines. The omg moment is when I actually savour this utterly delectable fish, native to the sub-continent, with its crispy exterior and fragile white flesh. Oh and P.S., the crispy lotus root with chilli honey is still seducing my thoughts. The desserts don’t jump out at me, however, clearly some adept kitchen wizardry has been performed to create the delicate, distinctive, creamy chilled mango pudding. There’s no cutting edge cooking here and I’m not convinced that the food is entirely archetypal Chinese, but the Golden Dragon is a restaurant which I could eat in forever, albeit my bank account not being in favour of this. I marvel at the genuine care and dedication of the staff who diligently go above and beyond the call of duty. Personally, I’ve been swathed in a blanket of nostalgia. I was first introduced to this restaurant by my grandmother and I’m anticipating bringing my own grandchildren soon enough.

Second to Naan

India has a staggeringly impressive street food scene and no matter where you go, you cannot help but stumble upon street food vendors and hawkers. The dizzying array of choices presented, will render you into an indecisive quandary, not knowing what to plump for. From different types of chaats to vada pav, to frankies, to the Bombay sandwich, to samosas, to ragda patties, to various types of kebabs and fish tikkas, to dosas, the list is just endless. The sizzling options are overwhelming and available by the bucketload.

With the world having woken up to the flourishing street food industry, the punter now enjoys food that is fresh, fast and contemporary, with flavours that definitely pack a punch. There's a vibrant energy around any street food stall, a feeling of exhilaration and anticipation. Those emotions are almost certainly reflected at home whenever I tell my family that it's street food Sunday. The announcement usually elicits whoops of joy! 

Over the years I can undoubtedly say that I have mastered the art of making somewhat healthier street food by combining fresh, high quality ingredients to create dynamic, zesty dishes, bursting with flavour. Naan sliders are so often part of the ultimate weekend feast and I can't make them fast enough in my house, evidently a seal of approval! There are several stages to this recipe, but it is definitely worth the effort, all made easier with having everything 'mise en place!' Homemade naan topped with chargrilled marinated paneer or chicken, pickled red onions, coriander chutney and spicy yogurt certainly hits the spot. Slam dunk!

Chicken or Paneer Naan Sliders

Serves 6 : Makes 12 small sized Naans

Ingredients

For the Naan Bread:

  • 300g Strong White Bread Flour

  • 1 tsp Salt

  • 1.5 tsp Fast Action Dried Yeast

  • 1 tbsp Sugar

  • 160 ml Warm Water

  • 25g Melted Butter

  • 1 tbsp Milk

  • Butter for brushing the cooked Naans

  • Nigella (Kalonji) Seeds (optional)

For the Tandoori Paste

  • 4 Tablespoons of Greek Yogurt

  • Juice of half a Lemon

  • Juice of half a Lime

  • 3 cloves Garlic

  • 3cm piece of Ginger

  • 1 Green Chilli

  • 1 tsp Salt

  • 1 tsp Garam Masala

  • 1.5 tsp Paprika

  • 0.5 tsp Tandoori Masala

For the Yogurt Sauce

For the Pickled Onions

  • 1 Red Onion, finely sliced

  • 0.5 tsp Salt

  • 0.5 tsp Sumac

  • Juice of half a Lemon

  • 1 tbsp of Coriander (finely chopped)

Additional Ingredients

  • 320g Chicken Mini Fillets

  • 450g Paneer (cut into thick slices)

  • 250g Baby Spinach Leaves

  • Oil

Method

  • Mix all the tandoori paste ingredients together and then divide the paste into two bowls, one for the chicken and one for the paneer. Mix well and marinate for at least 2 hours, but preferably overnight.

  • Prepare the dough for the naans. Mix together the fast action dried yeast, with the sugar and 2 tablespoons of the warm water. Leave this for 10 minutes.

  • Mix the flour and the salt. I use a food processor with the dough hook, but you can do this by hand.

  • After 10 minutes add the yeast mixture, the melted butter, milk and warm water and mix into the flour until all the ingredients are incorporated and you've formed a sticky dough. If you're doing this by hand, knead for 5 minutes.

  • Place the dough in an oiled bowl and cover with cling film. Leave to rest in a warm place, and allow to prove for 60-90 minutes, or until the dough has doubled in size.

  • Whilst the dough is proving, prepare the onions. Mix all the ingredients together, in a bowl; the onions, salt, sumac, lemon juice and coriander. Refrigerate until required.

  • In a separate bowl mix the yogurt and the green chutney (in the recipe section) together and refrigerate.

  • Once the naan dough has doubled in size knock the air out and divide the dough into 12 balls.

  • Heat a frying pan on a moderate to high heat. Roll each ball out on your board to the size of a small plate. The dough is quite elastic so you can shape it if you wish. You may need to use some dry flour to prevent sticking.

  • Cook each naan on the frying pan until cooked and slightly charred on both sides. Brush with butter and sprinkle on nigella (kalonji) seeds. Keep the naans warm in a low oven.

  • Put 2 tablespoons of sunflower oil into a griddle or frying pan. Cook the paneer until browned on each side and keep aside. Repeat in a separate pan with the chicken. Its better to do this in batches.

  • Place the naans onto a platter and drizzle some of the yogurt sauce, then top with spinach leaves, add cooked, sliced chicken onto half of the naans and pieces of cooked paneer onto the other half of the naans.

  • Top randomly with the pickled red onions. A few more drizzles of the yogurt sauce and then serve.

Tips

  • Since I don't have a traditional tandoor oven, the closest I can get to the original naan is cooking it on a hot frying pan. However, if you are cooking for a crowd, double the recipe and you can always cook several naans together under a hot grill. Just keep a close eye on them, otherwise they burn easily.

  • This recipe is ideal for a summer barbecue, eating al fresco. The naans can be cooked on the barbecue, as can the chicken and paneer. Put all the ingredients out and let everyone make their own. There's plenty for everyone, including the paneer for the vegetarians

  • We can't always make everything from scratch, and if you're short of time you can always use shop bought naans as a substitute. I do urge you to make your own when you can, you will not be sorry!

  • As always the recipe is open to personal interpretation. If you haven't made the green chutney (which is in my recipe section), improvise! Substitute it with grated cucumber enhanced with some salt and chilli and use this raita as your sauce. Alternatively, if you prefer, add a little mango chutney into the plain yogurt. Play around with flavours and have fun.


Daily Bread

Bread has been getting a bad press for sometime and appears to have become the enemy. I could quite happily inhale the bread basket every time it's placed in front of me in a restaurant, but I spar with that voice in my head demonising the humble bread roll. I can definitely stuff my face with every kind of carb known to man and bread I find is particularly difficult to resist. I drool at the thought of focaccia, olive ciabatta, poilâne, bagels and brioche. However, it's with great sadness that bread and myself have had a very toxic relationship and as with any torrid love affair we’ve had to part ways.

My blissful childhood was filled with weekend picnics to the Lake District, family and friends in tow. My mother and all my aunts would make a mountain of puris and parathas accompanied with spicy potatoes and mango pickle. Bombay sandwiches and Frankie rolls were devoured in minutes. We would sit on blankets savouring this delicious carb laden food, all washed down with thermos flasks of hot cardamom chai and finished off with delicate homemade saffron and pistachio Indian cookies, Nankhatai. Those innocent, nostalgic, heady days were fun-filled and full of laughter, often resulting in food eating competitions. This often rendered me into a food coma and any maladies were put down to greed!

However, when I was diagnosed with coeliac disease in my early adulthood, I was able to put all the pieces of the jigsaw together. Coeliac disease is caused by a reaction of the immune system to gluten, a protein found in wheat, barley and rye. The only cure for this autoimmune disease is to eliminate all gluten from your diet and hey presto you're fine! Over the last few years, the market in gluten free products has exploded and being gluten free is seen as being fashionable, a fad even. Always wanting to be a purveyor of fashion, this however, is not something I had ever desired to give up. It was what I thought at the time, a travesty and I even mourned the ramifications. The upside of this so called 'trend,' is that gluten free options are ubiquitous in supermarkets and most restaurants. London's gluten free bakery, Beyond Bread offers a smorgasbord of everything gluten free. I no longer have to pine for a freshly baked baguette and finally I can have my gluten free cake and eat it!

I don't shy away from making everything for my family, I just don't eat it myself. Breads, cakes, pasta all feature in my repertoire, but I occasionally substitute certain ingredients for gluten free ones whenever I feel the need to satiate my own desire for bread. One of my family's favourite desserts, that I would like to share with you, is Bread and Butter Pudding. The denouement of any meal, with this dessert will certainly result in happy endings. Let's break bread.

Bread and Butter Pudding

Serves 8

Ingredients

  • 1 Brioche Loaf 400g

  • 400ml Milk

  • 600ml Double Cream

  • 6 Free Range Eggs, large

  • 225g Vanilla Sugar

  • 40g Golden Raisins

  • 30g Butter, softened

  • 50g Pistachio Nuts, shelled & unsalted

  • Few strands of Saffron (optional)

Method

  • Slice the brioche loaf into thin slices and cut each slice into two triangles.

  • Place the milk and double cream and saffron if you are using it, into a heavy based pan and slowly bring to the boil.

  • Once boiled, take it off the heat and allow to cool slightly.

  • Whisk the eggs and the sugar together until it is pale, light and leaves a trail.

  • Add the cooled cream and milk to the egg mixture and whisk together.

  • Butter a baking dish with the 30g of softened butter and arrange all the brioche triangles into it.

  • Scatter the golden raisins on top of the bread and carefully pour on the custard.

  • If any of the bread floats to the top, push it down with the back of a spoon, ensuring it is immersed in the liquid.

  • Chop the pistachio nuts into thin slivers and scatter over the pudding.

  • Leave the pudding for several hours or overnight to ensure that the bread has soaked up all the liquid.

  • Place the baking dish into a larger roasting tin, which has been lined with a newspaper. Fill the roasting tin with warm water so the water comes up half way up the side of the baking dish. This is a bain-marie, or a water bath and will prevent the milk from boiling and curdling the eggs.

  • Place into the oven and cook in a pre-heated fan-assisted oven at 165 degrees celsius or equivalent, for 35-40 minutes, or until the top is golden brown, but there will still be a slight wobble.

  • Serve hot or cold.

Tips

  • If you do wish to make this dessert gluten free, substitute with gluten free brioche rolls, or brioche bread, slice.

  • If you do not have vanilla sugar, just use regular caster sugar.

  • If you want to make vanilla sugar, add a vanilla pod into a container of caster sugar. Store and use as required.

  • It is best to use golden raisins, or even green raisins if you wish.

  • Using saffron is optional. It will change the flavour of the custard and will add a mellow yellow tinge to it.

Photo 30-06-2016, 23 50 16.jpg

Spilling the Beans

My love affair with cookbooks started about thirty-eight odd years ago when cooking became a part of my life. It was only once married did I even venture into the kitchen to cook. Prior to that I was my mother's chief taster and each weekend on my return from university I would devour the feast that she had so lovingly prepared for me. Despite my cooking skills being honed out of necessity, cooking developed into a passion and I now stand before you, a die-hard cook and foodie. 

There is always a teetering stack of cookbooks by my bedside; food porn dare I say! Thus, I must confess that I am a cookbook addict. There, my 'secret' is out in the open! I love to pore over those antiquarian treasures, gifted to me so long ago, just as much as the clean glossy coffee table variety. There is however a place to go to; not quite rehab, but a trove in fact, which literally feeds my addiction. Books for Cooks in Notting Hill in London, is a quirky bookshop crammed with thousands of cookbook titles, where they actually 'cook the books' by testing out the recipes and selling the prepared dishes in their cafe.

One such coffee table tome, entitled My Last Supper was bought for me several years ago by one of my sons. Fifty of the world's most famous chefs share their last supper fantasies, disclosing the chef preparing it, the location, the invitees and of course the meal itself. This book by Melanie Dunea, is a culinary revelation of the world's leading authorities on food. Despite cooking the finest, most expensive, exquisite ingredients on the planet, most of these chefs wish for simple more rustic foods as their last supper. The book is actually food for thought and I've posed this question to friends and family numerous times. The overwhelming result is that we are inclined to turn to comfort foods. For me personally, I'm once again in the halcyon days of my childhood, at my mother's kitchen table yearning for a hot bowl of rajma chawal, which translated, is a red kidney bean stew with basmati rice. Rajma is a popular North Indian, Punjabi vegetarian dish of red kidney beans cooked in a thick, lightly spiced gravy. For me this is basically a big hug in a bowl. It is comfort food laced in nostalgia. I hope you too will add this to your vegetarian repertoire and savour this big bowl of happiness. 

Rajma

Serves 8-10

Ingredients

  • 680g Dried Kidney Beans

  • 2 Large Onions, finely chopped

  • 4 tbsp Oil

  • 6 Cloves of Garlic

  • 4 inch piece of Ginger

  • 1 Green Chilli

  • 400g Tin Chopped Tomatoes

  • 2 dessertspoons Tomato Puree

  • 3.5 tsp Salt

  • 3 tsp Garam Masala

  • 2.5 tsp Ground Coriander Powder

  • 50g Fresh Coriander (Cilantro), finely chopped

  • 100ml Double Cream (optional)

Method

  • Soak the dried kidney beans overnight, in a large pan in 2 litres of water and cover.

  • The following day, drain in a colander and rinse the kidney beans thoroughly under cold water for several minutes.

  • The kidney beans can either be cooked in a pressure cooker, as per the manufacturers instructions, or boiled in a pan.

  • I put the beans into my pressure cooker with double the quantity of water and place the lid on. Once the pressure is reached, I reduce the heat to a moderate setting and cook for 20 minutes. After this time I remove from the heat and once the pressure is released remove the pan lid. The kidney beans are now tender and have split slightly.

  • If you don't have a pressure cooker, the kidney beans must be boiled in plenty of water for around 60-90 minutes, until the beans are soft, tender and slightly split. (You may need to top up the water regularly whilst boiling the beans).

  • Grind the garlic, ginger and chilli together to a paste.

  • Fry the chopped onions in the sunflower oil and add the garlic, ginger, chilli paste.

  • Cook this onion mixture on a moderate heat until the onions are golden brown.

  • Add the chopped tomatoes and the tomato puree into the onion mixture and cook slowly for about 40 minutes until the tomato mixture has turned a dark red and the oil starts to emerge around the edge of the pan.

  • Add the salt, garam masala and ground coriander powder.

  • Add the tomato mixture to the cooked kidney beans and add about half a litre of boiled water to loosen the curry.

  • Cook on a low heat for about 1 hour, or until the gravy has thickened. You may need to add more boiled water if needed.

  • You will end up with a thick stew and mix in the chopped coriander and double cream before serving.

  • Serve the rajma with basmati rice or hot roti.

Tips

  • If you are using a pressure cooker, it is imperative to follow manufacturers instructions.

  • If you are considering investing in a pressure cooker, I recommend buying a stainless steel one, as opposed to an aluminium one. Electric pressure cookers are definitely worth the investment.

  • The rajma recipe can be halved if you do not want to make a large pot of it, or alternatively it is suitable to freeze in freezer friendly containers.


Mum's the Word

I could wax lyrical all day about motherhood. I love being a Mum, and yes it has also been quite a challenge at times. I have encountered the whole spectrum of emotions in the thirty-eight years of being a mother, but the overriding one has always been love enveloped with protective responsibility. The bond I have with my sons is unyielding; the joy that these boys have given me knows no bounds and I feel honoured that I get to be their mother. However, it was only once I became a Mum, did I wholly realise the exalted status that my own mother deserved.

Young children have this incredible ability to make you forget your worries and hey presto everything is just fine when you enter their world. A world full of giggles and innocent laughter. I fondly recall every Mother's Day, my little boys scrambling up the stairs aided by their Dad with a breakfast tray laden with goodies for me. My oldest son proudly carrying the flowers, the middle one clutching the chocolates and the tiny one trailing behind with the homemade cards. They would clamber onto my bed, smothering me with hugs and kisses, with the tiny one left squealing as he couldn't climb up! Now in their thirties I'm looking forward to my breakfast tray, but instead of tea, toast and fruit, how about eggs benedict and mimosas boys? 

I absolutely love cooking for my family and they are an incredibly receptive and appreciative audience. There is something very profound in cooking for those you love, something very significant, something very wholesome. Nurturing your family just seems to strengthen the bond, especially when you all sit down to enjoy the fruits of this labour. We all recall special moments in our lives related to food, usually starting at our mother's kitchen table. As adults, we are desperate for our mothers to recreate the nostalgic foods that we crave and as mothers it allows us to connect to a deeper part within us. For me, my cooking is an offering of my love to my family and friends, pure and simple. I'm sharing a cupcake recipe which is enhanced with cardamom, pistachios and rose petals. Enjoy this expression of love and indulge your loved ones. Happy Mother's Day to all you incredible Mums out there.

Pistachio & Rose Petal Cupcakes

Makes 5 large cupcakes, or 7 medium cupcakes 

  • 125g Butter, unsalted

  • 100g Caster Sugar

  • 2 free-range Eggs

  • 110g Pistachio Nuts, finely ground

  • 50g Plain Flour, sifted

  • 0.5 tsp ground cardamom (optional)

  • Zest of 1 unwaxed Lemon, finely chopped

Frosting

  • 75g Icing Sugar, sifted

  • 25g Butter, unsalted and softened

  • 75g Cream Cheese, cold from the fridge

  • 4 drops red food colouring

  • Dried Rose petals

  • Few Pistachio Nuts, chopped into slivers

Method

  • Cream the softened butter and sugar together until it is light, pale and fluffy.

  • Beat the eggs lightly and add into the butter and sugar mixture a little at a time, incorporating well after each addition.

  • Add in all the ground pistachio nuts and the zested lemon rind, mixing well into the mixture.

  • Fold in the sifted plain flour.

  • Place 5 large cupcake cases, or 7 medium cupcake cases into a muffin tray.

  • Divide the batter between the cupcake cakes, filling them two-thirds of the way up.

  • Bake for 20-25 minutes at 165 degrees (fan-assisted), or equivalent.

  • Remove from the oven once an inserted skewer comes out clean and allow to cool.

  • For the frosting, beat the icing sugar and the butter together until it is well mixed.

  • Add all the cold cream cheese and the red food colouring and beat until it is light and fluffy for about 5 minutes, but do not overbeat.

  • Spoon the frosting onto each cupcake and smooth with a spatula.

  • Decorate each cupcake with the dried rose petals and pistachio slivers.

Tips

  • Grind the pistachio nuts in a small coffee grinder. I use one exclusively for nuts and spices, used only for desserts.

  • You can substitute the plain flour in the recipe for gluten free plain flour and then the cupcakes are suitable for anyone with a gluten intolerance.

  • When smoothing the frosting onto the cupcakes, use a spatula. In order to get a very smooth finish, dip the spatula into hot water before smoothing it. Alternatively, you can pipe the frosting onto the cupcakes if you wish.

  • Instead of 5 large cupcakes, you can make miniature-sized ones as part of an afternoon tea. Alternatively, double the recipe and make a large cake, placing the batter into a 23cm loose bottomed cake tin.

Indian with Love

Valentine's Day is round the corner and the pressure to make it the ultimate romantic day of the year hangs in the balance. Or does it? I'm not convinced that it deserves the reverence and sense of occasion bestowed onto this day. Partners are under duress to exhibit their love with flowers, dinner, champagne and clichéd gifts, but really it's the over-commercialised cheese that I personally loath, not the notion of romance per se. I'm not a killjoy but there's so much more to love than a mere twenty-four hours of imposed romance. 

Being a self-confessed foodie, I love eating out, but the idea of dining out on Valentine's Day in a restaurant full of awkward couples, fills me with dread. In fact I think cooking a meal for someone is a significant act of love, now that's amore and as that old adage cites, the way to a man's heart is through his stomach. Or to a woman's for that matter. It's all about the effort and about making it deeply personal.

Valentine's Day falls during that post-Christmas time of year, when everything is a grey blur! I guess that February is only redeemed with the whiff of love in the air. I suggest that if nothing else, we celebrate this day with some delicious food and definitely some decadent desserts. I believe in making life easy, so if you're going to make a beeline for the kitchen to set the mood for love, keep it simple. Sharing-food is the obvious answer to heighten your romantic experience. By all means indulge in those traditional aphrodisiac foods, but I just want to draw your attention to a few ingredients that have proved to spark romance. Avocados, chillies, pine nuts, olive oil and rocket are all known to have 'lustful' properties, so let your imagination run riot and create some magic with these 'in the mood' foods. And of course don't forget to cook with love, the food always tastes better.

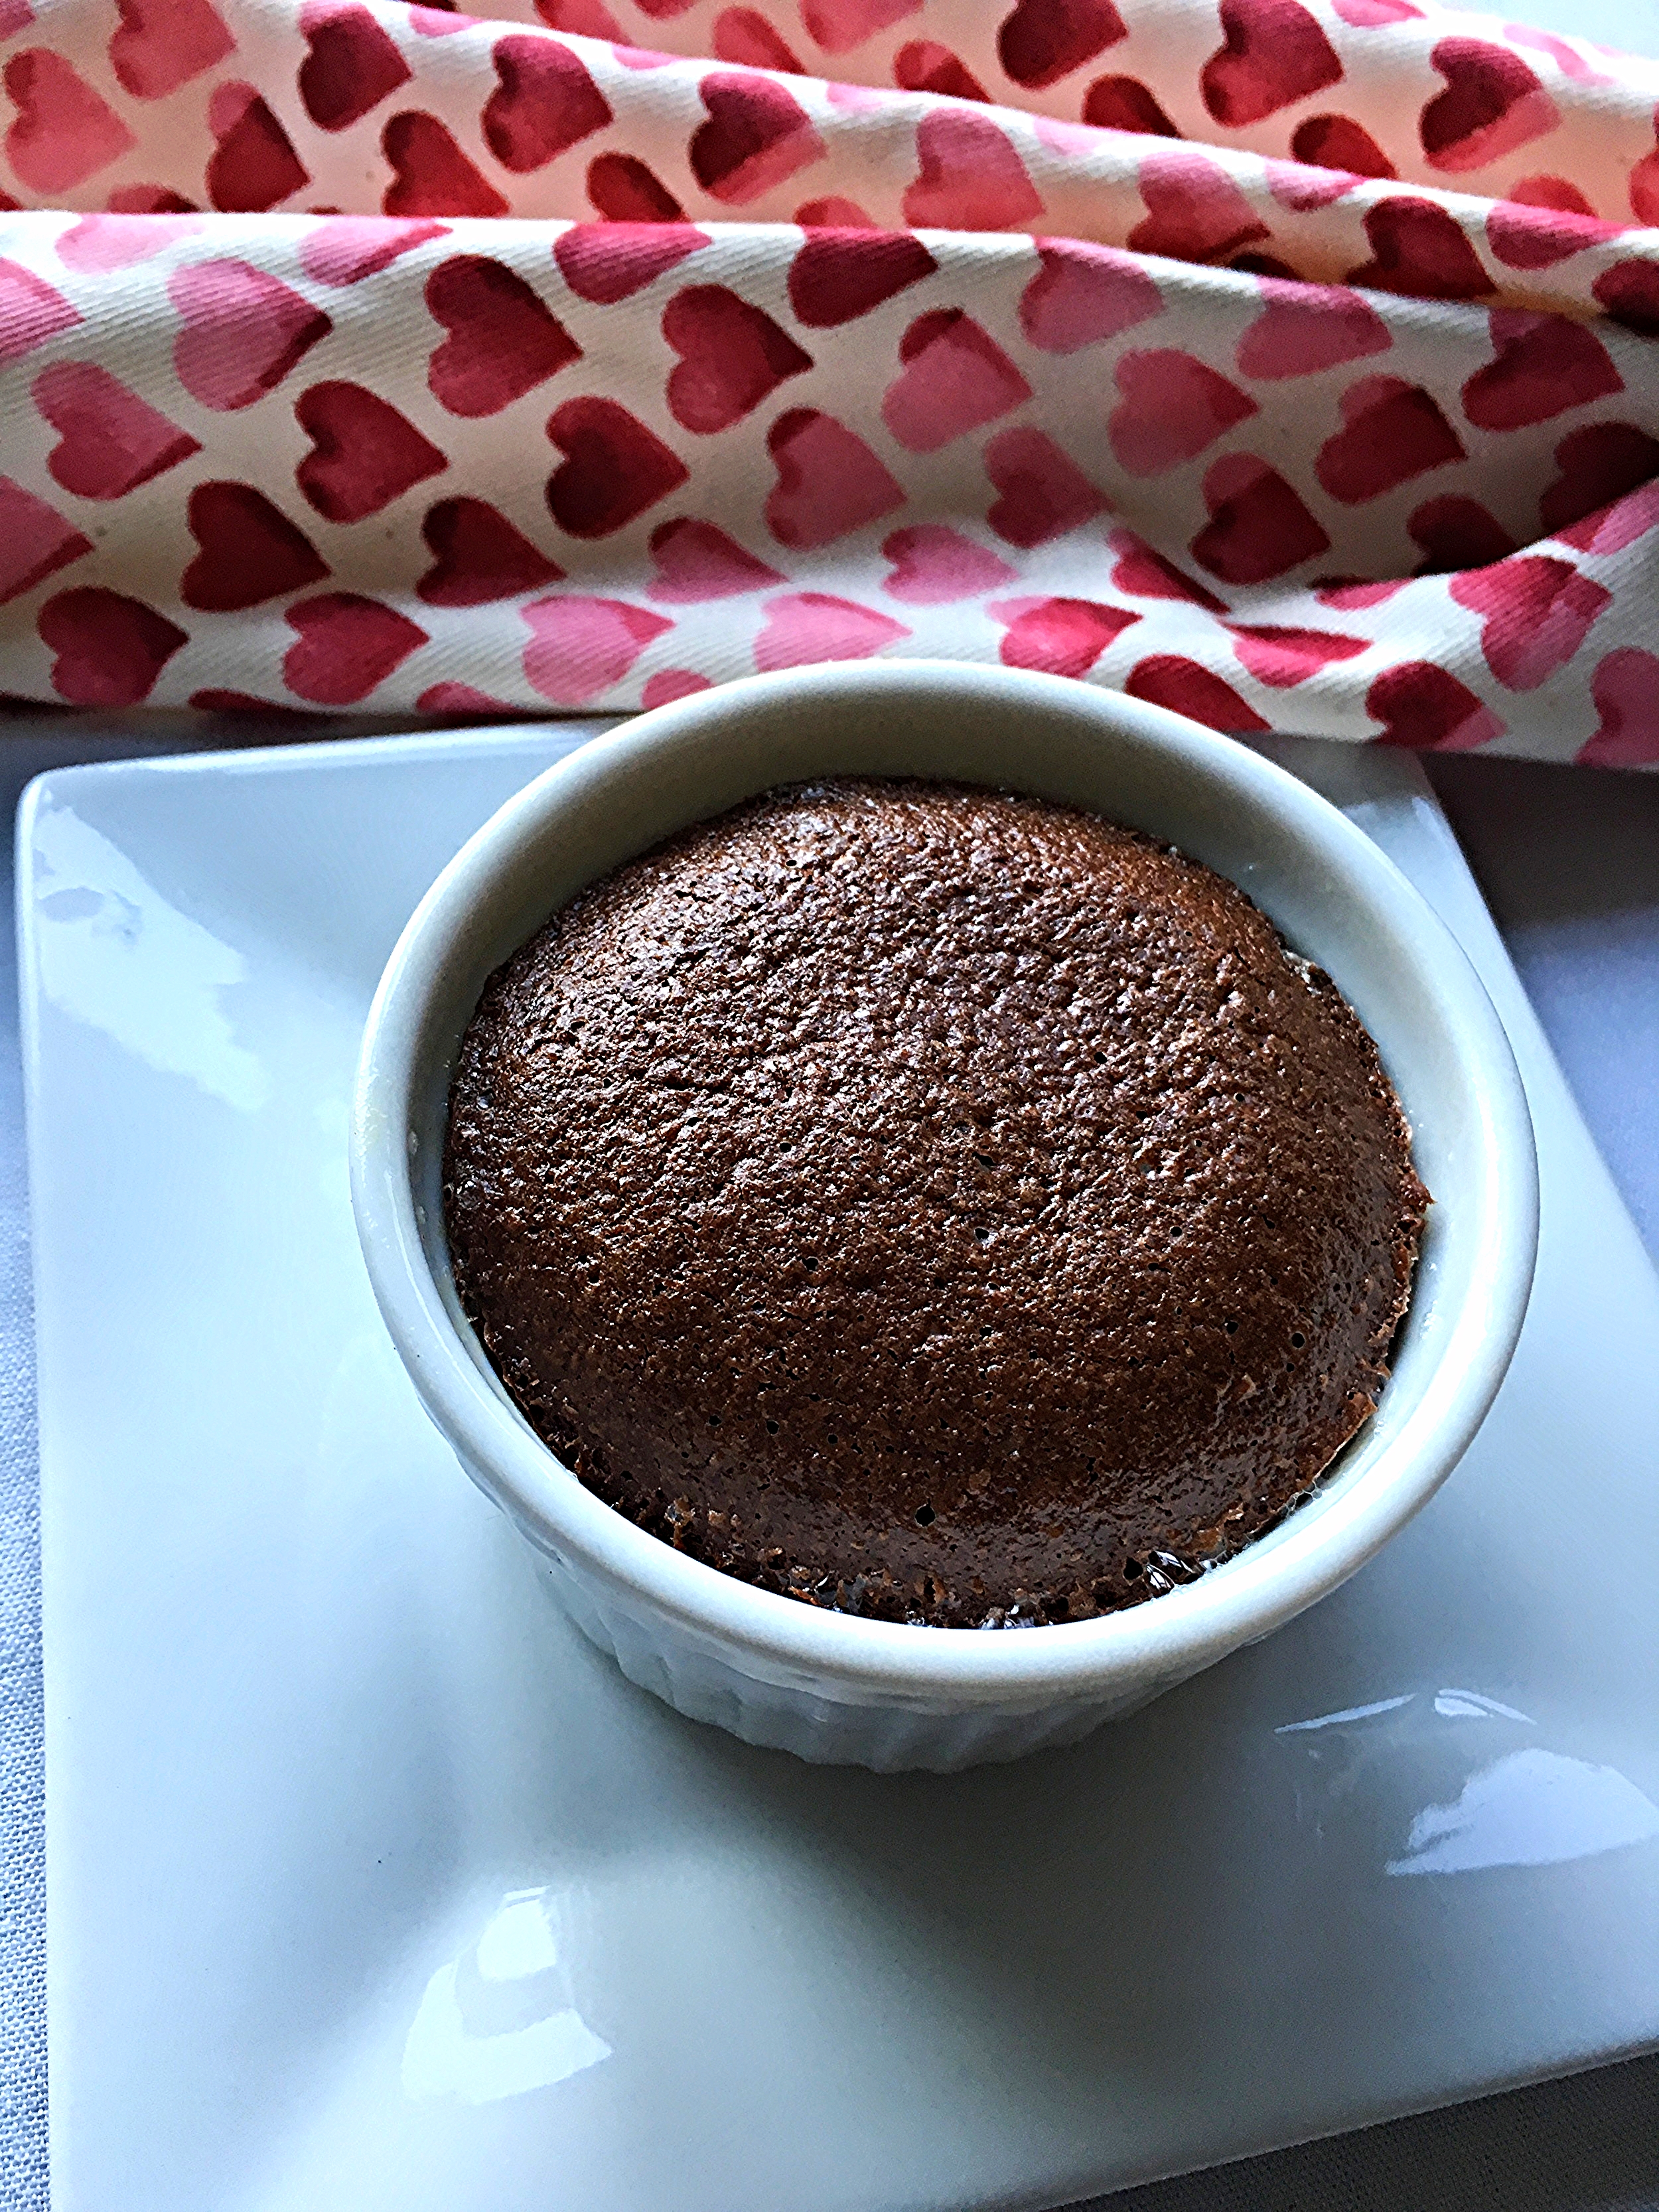
Chocolate and Valentine's Day go hand in hand. Apparently, chocolate contains phenylethylamine, a chemical stimulant, which is released by the brain during a passionate exchange. So I think it fitting to end a Valentine's Day meal with a chocolate dessert. I want to share a chocolate fondant recipe, that is not only luxurious, extravagant and indulgent, but is also sophisticated and uber sensual. This recipe is very simple and it ticks every check box. Whether you're making this for a potential partner, lover, spouse, parent, sibling, child or family, it's sure to put a smile on everyone's face. And even if Cupid hasn't sharpened his arrows you'll definitely fall in love with this dessert! XOXO

Chocolate Fondant Dessert

Serves 4

Ingredients

  • 90g Caster Sugar

  • 150g Unsalted Butter plus extra for greasing

  • 150g Dark Chocolate (70% Cocoa Solids)

  • 3 Free Range Egg Yolks

  • 3 Free Range Eggs

  • 1 tbsp Plain Flour

Method

  • Pre-heat the oven to 165 degrees celsius (fan-assisted oven), or equivalent.

  • Using the extra butter, grease four large ramekins, or dariole moulds and set aside.

  • Chop the butter into small cubes and break up the chocolate.

  • Place the caster sugar, butter and chocolate into a heatproof bowl, over a pan of simmering water. The water must not touch the bowl.

  • Simmer gently, until the butter and chocolate have melted and then remove the bowl from the pan.

  • Whisk the melted ingredients together.

  • Add the egg yolks and the whole eggs and beat well, into the chocolate mixture once it is cool.

  • Fold the flour into the chocolate mixture with a metal spoon.

  • Pour the mixture into the ramekins, or dariole moulds and fill up to three quarters of the moulds.

  • Place the moulds into the fridge for about 20 minutes and once chilled remove from the fridge and place onto a baking tray. 

  • Cook for 10 minutes and then remove from the oven.

  • These can either be served straight in the ramekin, or if you have made them in a dariole mould, you can turn them out onto individual plates.

  • Serve with double cream, whipped cream or clotted cream.

Tips

  • If you want to make these in advance, just keep them in the fridge and then remove 30 minutes before cooking them in the oven.

  • When you place your spoon into the chocolate fondant, it should have a melting molten middle.

  • If you're making this dessert for just two people, then by all means halve the recipe, alternatively, have the extra two for breakfast!

Photo 11-02-2016, 16 20 59.jpg


New Year, Same Me!

Brace yourselves for the new year mantra of detox, diets and exercise! 'New year, new you,' is all we hear, but really, is such a radical cleanse of the seasonal excesses totally necessary? After all, we are marooned in the middle of this grey, wet winter and surely some heartwarming comfort food and a little tipple wouldn't go amiss.

So here is my proposal, let's compromise and save the green juice cleanse, the multitude of orthodox salads and the fat-free diet meal plan for a later date and enjoy a little bit of what we fancy. I'm not refuting the wise words of our health gurus and I'm not suggesting by any stretch of the imagination, that we tuck indiscriminately into greasy fried food, but practise some semblance of moderation. 

We spent December looking forward to Christmas parties, luxurious foods and feasting. Rather than being a month of totally abstaining from some of life's enjoyable perks, January should have some sort of balance and why not embrace the healthy stuff? Let's make it simple, light and fresh. Courgette spaghetti or 'Courgetti,' as it is known by trendy food fashionistas, has revolutionised my life. You are hoodwinked into believing that you are devouring a bowlful of comforting pasta, but without all the starchy carb heaviness. The courgette spaghetti is prepared using a spiralizer, a julienne peeler, or even the humble kitchen knife. I kid you not, once you start making vegetable pasta, your imagination will start to run riot. I've teamed up my gluten free courgetti with an avocado pesto which adds a silky creaminess. It's fast, tasty, nutritious, satisfying, uber guilt-free and you can eat it by the bucket load. With the momentum of the New Year and all this feel-good food, I'm going to resolve to start my January fitness regime! Happy 2016!

Courgetti with Avocado Pesto

Serves 2

  • 250g Courgette

Pesto

  • 1 ripe Avocado

  • 1 clove Garlic, finely chopped

  • 2 tbsp Olive Oil

  • 1 Spring Onion, finely chopped

  • Juice of half small Lime

  • Half Green Chilli, finely chopped

  • 1 tbsp plus extra for the topping, Parmesan Cheese, finely grated

  • 15g fresh Coriander

  • 1 tbsp Pine Nuts

  • 0.5 tsp Salt or to taste

Method

  • The courgette needs to be spiralized to make it into spaghetti. You can use a julienne peeler, or a knife if you don't have a spiralizer. Set aside once done.

  • Place one tablespoon of olive oil into a small frypan and heat up on a medium setting. Place the chopped garlic into the olive oil and fry for around 30 seconds. Do not allow it to brown and take it off the heat and set aside.

  • Peel and chop the avocado into a bowl and mix in the lime juice and add the salt. Using a fork, just mash the avocado until it is smooth.

  • Into a herb mill, or small food processor, add the chilli, coriander, pine nuts and spring onion and blitz.

  • Add this mixture from the herb mill into the avocado, along with the garlic and the Parmesan cheese and mix it all together.

  • In a large fry pan or wok, add a tablespoon of olive oil and on a medium to high setting heat up the oil. Add the courgetti and cook for 1-2 minutes and then add the pesto. Take the pan off the heat and the pesto will stay warm in the residual heat.

  • Serve the Courgetti immediately and sprinkle over some more Parmesan cheese on top.

  • Serve the Courgetti as a light meal, or as an accompaniment to any meat, chicken, fish or vegetable dish of your choice.

Tips

  • When using Parmesan cheese, always use Parmigiano-Reggiano.

  • I always make double the amount of avocado pesto and use half of it in the Courgetti and keep half in my fridge to serve with any main dish, or as a dip with crudités, or even as a spread in sandwiches or on toast.


Let There Be Light

The hallmark of Autumn is when the leaves start to turn and there's a nip in the air. The transition of summer into winter brings with it stunning fiery colours, a glut of apples, pears and plums in the garden and a treasure trove of cosy autumnal comfort food goodies. Halloween, Bonfire night, Thanksgiving and Christmas are all food dominated celebrations, lest we forget the pinnacle of all Hindu religious celebrations, Diwali.

Diwali (or Deepavali) is the festival of lights, celebrated by Hindus, Sikhs and Jains and is always observed in the month of Kartik, which falls between October and November, on the night of the new moon, which also happens to be the darkest night of the year. Diwali signifies good over evil, light over darkness, truth over falsehood, knowledge over ignorance and hope over despair.  

Diwali is a joyous, colourful and vibrant celebration signifying the return of Prince Rama and his wife Sita, to his kingdom Ayodhya, following fourteen years of exile. Legend has it that Rama, Sita and Rama's brother Lakshmana were exiled to the forest, by their father, King Dashratha on the insistence of their stepmother Queen Kaikeyi, who had aspirations for her own sons to be in line for the throne, thus ousting her stepsons. Whilst in the forest, Sita was kidnapped by the demon king Ravana, so Lakshmana and Hanuman (the monkey king), battled with Ravana and his army to rescue Sita. After defeating the demon king Ravana, oil lamps or diyas were lit to help guide the royals back home. 

Diwali honours Lakshmi the Goddess of Wealth and Prosperity. The occasion is marked with prayers, fireworks and the lighting of lanterns, diyas and candles to invite Lakshmi to bless our homes. It is traditional to wear new clothes and making household purchases is considered auspicious. Diwali is a time of feasting with family and friends and mitai really is the protagonist of the festival.

Indian mitai, or sweets, are not only gifted, but are devoured throughout the Diwali season. Ladoos, barfis and halwas are all sweets made with semolina, carrots, lentils, dried fruits, nuts, cream and usually embellished with saffron, cardamom or nutmeg and blinged up with gold or silver leaf.

Unlike Christmas, there is no set meal for Diwali and it's really open to family interpretation. My own family tend to feast on various chaats, pakoras, daals, curried chickpeas, paneer dishes and pilaus with moreish flaky breads. Despite the stiff competition from extravagantly packaged mitai, its always Gajar Halwa that's a hit in my home. This is a rich carrot and creamy milk based dessert with subtle hints of saffron and cardamom enhanced with almonds and pistachios and although slightly time consuming, it's so worth the effort.

Happy Diwali!

Gajar Halwa (Carrot Pudding)

Serves 10-12

  • 2 litres Jersey Gold Top Milk

  • 1 kg Carrots, finely grated

  • 175g Sugar

  • 4 Green Cardamoms, finely ground

  • 1 tsp Saffron Strands

  • 3 tbsp Ground Almonds

  • 3 tbsp Pistachio Nuts, finely chopped

  • 3 Sheets of Silver or Gold Leaf (optional)

Method

  • Place the milk into a heavy-based pan and bring it to the boil.

  • Lower the heat to medium and add the carrots, sugar, saffron and cardamom.

  • Stirring occasionally, cook until all the liquid has evaporated. This should take about an hour and a half.

  • Once the liquid has reduced, lower the heat to a low flame, stirring constantly, as the mixture tends to bubble up and keep cooking until the carrot mixture becomes slightly darker orange. Add the ground almonds and chopped pistachios and stir in.

  • Allow to cool slightly and place in a serving dish. Decorate with silver leaf. Gajar Halwa can be served either hot or cold.

Tips

  • If you don't have any silver leaf, you can decorate with some chopped pistachio nuts.

  • The halva freezes well also.

  • I use a coffee mill to grind the green cardamoms and nuts, which I keep only for desserts.

Say Cheese

I've just returned from the City of Angels and boy am I missing that Southern Californian sunshine! Los Angeles is a city I'm fortunate enough to visit regularly, as I have a son who lives there, in fact I'll go as far as to consider myself an honorary Angeleno! It's not about smiling, posing and saying cheese in front of the iconic Hollywood sign, oh no Los Angeles is all about the impressive dining scene. Being a devoted food-lover, LA is quite honestly a foodie mecca and it's the diversity of cuisines available which astounds me. The quality of gourmet food is unrivalled and the dilemma arises when deciding on what to eat, once you've got to grips with such prodigious choices.

The food scene in LA has changed markedly. The food truck explosion offers not only excellent high end food, but with the added bonus of being on a budget as well. One of the most famous is the Kogi BBQ truck, under the direction of Chef Roy Choi, which serves up gourmet fusion Korean Mexican tacos to discerning Angelenos. The food truck platform has evolved and if it's a late night grilled cheese sandwich, taco chaat or a lobster roll which satiates your hunger, it's all within easy reach.  

If something a little more refined takes your fancy, LA has it all. Whether you want Mexican, Chinese, Korean, Indian, Japanese, French, Italian, farm-to-table, vegetarian, vegan, gluten-free, zero carb, healthy, unhealthy, it's all there. Yes La La Land, a very apt moniker by the way, will actually render you into a state of unconsciousness, a food coma in fact, with its dizzying array of options. My never-ending bucket list of restaurants in LA just keeps growing every time I visit. All food aficionados will head straight to Wolfgang Puck, Thomas Keller and Nobu Matsuhisa establishments, but there's a Japanese inspired restaurant Hinoki and the Bird, which has a fabulous cocktail menu, many of them being fruit inspired. The food is very tactile and our senses are heightened by the use of innovative cooking methods. The lobster roll is genuinely a rave for your tastebuds. The citrus, basil piquancy of the lobster is the antithesis of the charcoaled bread roll. Sublime!

Gjelina is a favourite farm-to-table restaurant in a health obsessed corner of LA. The eggplant caponata on toast with burrata, pine nuts and balsamic is a mandatory choice as far as I'm concerned. Its big, bold, brash flavours are complemented by the delicate, creamy burrata. Bottega Louie is a no-reservations buzzing downtown Italian restaurant with a French patisserie, housed in a palatial Romanseque revival style building. Be prepared for sizeable portions, huge crowds and a cacophony of chefs, waiters and diners, but Bottega Louie has worked out the formula for success. Despite the grandiose, imposing, stately decor, the restaurant is very moderately priced. For appetisers, you absolutely must get the crab beignets...totally addictive! You have to order the thin-crusted Italian style pizza in any flavour that takes your fancy, but the proscuitto di Parma with burrata and rapini will have you reminiscing long after you've left. And if you don't have any room left for dessert, you can always buy the pastries, cakes or macarons, lined up in glass cases with military precision. LA has too many convivial restaurants for me to visit, and on leaving this extraordinary food city I suffer from separation anxiety; from my son of course! What else? 

I want to share a very simple recipe that I created for my love of burrata, the most delicious Southern Italian cheese. Burrata is a Puglian speciality and has an outer shell of mozzarella and the inside is filled with ribbons of mozzarella and cream (stracciatella), which gives it that rich, buttery, creamy texture. Burrata used to be quite difficult to find, so you can't imagine how thrilled I am, that I can now buy fresh burrata in my local Waitrose. This simple salad with heirloom tomatoes, avocado and topped with torn soft burrata is embellished with my coriander and pistachio pesto and it is a fresh salad to enjoy the last hurrah of summer.

Heirloom Tomato, Avocado & Burrata Salad with Coriander & Pistachio Pesto

Serves 4

  • 400g Mixed Heirloom Tomatoes

  • 1 Avocado

  • 200g Burrata Cheese

  • 35g Coriander

  • Handful of Pistachio Nuts

  • 1 Clove Garlic, finely chopped

  • 1 tbsp Parmesan, finely grated

  • 75ml Olive Oil

  • Salt to taste

Method

  • Make the pesto by blitzing the coriander, pistachio nuts and olive oil in a herb mill, food processor or even a pestle and mortar. Once done, place into a small bowl.

  • Fry the chopped garlic in a frying pan with a teaspoon of olive oil, until it starts to turn golden, which should take a couple of minutes. Add into the coriander mixture and add the parmesan cheese. Taste and add a little salt if needed. Set this aside.

  • Chop the tomatoes into bite-size pieces and arrange them onto a platter.

  • Slice the avocado and add them to the tomato platter.

  • Roughly tear the burrata and place randomly onto the platter.

  • Drizzle the pesto and a little extra olive oil and serve.

Tips

  • Heirloom or heritage tomatoes are available in most supermarkets. They are colourful and their flavour is superior. Sustainable farming methods are used to grow them.

  • If you do not like coriander, then you can substitute it for basil to make the pesto.


Mad about Curry

There's something that's been bothering me for a while. Why is all Indian food referred to as 'curry?' The original Tamil word is kari, meaning spiced sauce. This generic reference doesn't actually mean anything. Indian flavours are complex and intricate, and to refer to everything as 'curry' simply devalues a cuisine that is inextricably linked with such a rich and vast culture.

'I'm going out for a curry' is a phrase unheard of in the Indian subcontinent. This was a phrase conceived by the British colonialists to refer to a generic sauce-based, homogenised, spicy Indian dish. The swathe of blanket kormas, baltis and tikka masalas with a choice of any meat, chicken or vegetable, swimming in oil, is irritatingly inauthentic. Indian cooking should manifest its regional diversity. Recipes are often not documented and handed down from generation to generation just by word of mouth, for fear of plagiarism. This is one of the reasons that Indian food, despite its culinary refinements, is not as well chronicled as French food for example.

The Mughals from Afghanistan settled in Northern India bringing an array of spices, fruits and nuts and combined these with yoghurt and cream, thus concocting 'Mughlai' cuisine. Punjab with its fertile land, ideal for the production of wheat, is known as the 'Granary of India.' Punjabis are well known for their love of food and the Punjab is acclaimed for its tandoori cooking. The Persians came and settled in the southern half of India and these 'Parsees' as they are known, introduced their 'Dhansak' style, which integrated lentils and spices into their mutton or chicken dishes. The Western part of India, mainly Mumbai and Goa with its Portuguese influence due to four hundred years of Portuguese colonialism, has outstanding seafood dishes using coconut milk and tamarind. Gujarat in the west is predominantly vegetarian. Many Gujarati dishes are often simultaneously salty, spicy and sweet. Rice and lentils are the staples of South India, as well as fiery vegetable dishes using coconut, mustard and curry leaves to embellish their food. Bengal in the East is where fish is abundant and therefore widely eaten alongside rice. Bengalis are renowned for their 'Mishti,' or sweetmeats. These various regional distinctions are only the tip of the iceberg of our profound culinary heritage.   

The popularity of Indian food is undeniable. The 'national dish' in the UK is curry and the Indian restaurant industry in Britain is worth almost £4 billion. The food of India recreated abroad has become a melting pot of Indian culture. Furthermore, it's impossible to represent intricate regional nuances. So the umbrella term 'curry' has actually done wonders for the profile of Indian cuisine and curry is now ubiquitous having become a worldwide phenomenon. 

On a more personal note, all celebratory, significant moments in my life, whether they be birthdays, anniversaries, graduations, weddings, have always been accompanied by exquisite food and feasting. We are a family who eat together everyday; the sights, sounds and aromas are all a requisite and integral part of my family's ethos. From my Punjabi kitchen I would like to share with you a real crowd pleaser. Dare I call it a 'curry'? I have to relinquish my own aversion and start embracing the word, so I'm going to take the plunge and invite you to experience my Prawn Curry. With its North Indian influences, the spicing is subtle, but as always, every recipe is open to personal interpretation. The sizeable, juicy prawns are cooked in a rich, creamy, tomato based sauce with a final flurry of some added citrus notes. All that remains for me to say is Curry on Eating!

Perfect Prawn Curry

Serves 6

  • 1 kg King Prawns, raw, peeled & deveined

  • 2 Onions, finely chopped

  • 2 tbsp Oil

  • 2 Bay Leaves

  • 5 cm piece Ginger, peeled

  • 6 large cloves Garlic, peeled

  • 1 green Chilli

  • 1 tin chopped Tomatoes

  • 1 tbsp Tomato Puree

  • 3 Plum Tomatoes, finely chopped

  • 2 tsp Salt

  • 2 tsp Garam Masala

  • 1 tsp Coriander powder

  • 200ml Double Cream 

  • 2 Spring Onions finely chopped

  • Handful Fresh Coriander finely chopped

  • Half a Lime

Method

  • In a herb mill, grind the ginger, garlic and chilli to form a paste.

  • Take the prawns out of the fridge and set aside.

  • In a large pan heat the oil and add the onions, the bay leaves and the ginger, garlic and chilli paste.

  • Fry this on a moderate heat until the onions are a toasted brown colour, stirring occasionally.

  • Add the tinned tomatoes, the tomato puree and the fresh tomatoes and stir in. 

  • Lower the heat slightly and cook until the tomato sauce becomes a darker red and the oil starts to emerge from the edge of the pan. Make sure you regularly stir this to prevent it from sticking (If you want a smooth sauce, once cooled it can be put into a blender).

  • Stir in the salt, garam masala and coriander powder.

  • In a small bowl place the chopped spring onions with the juice of the lime and set aside.

  • Add the prawns into the tomato sauce. They should cook quite quickly and will change from grey to pink in about 5-10 minutes.

  • Keep stirring and once all the prawns are pink, add the double cream and stir in.

  • Stir in the lime infused spring onions, sprinkle with the chopped coriander and serve.

  • Serve with hot basmati rice, or roti or parantha.

Tips

  • I use raw, peeled and deveined king prawns. Use fresh or frozen raw king prawns.

  • If you use frozen prawns, make sure that they are defrosted and drain out any excess water in the bag. You can slowly defrost them overnight in the fridge.

  • If you use cooked prawns, they will be tough and chewy in the curry, so use raw prawns.


The Boys are back in Town

Last week was crazy busy. The three boys were all home and I was happy to indulge them in all their foodie desires. There is one meal that will always grace our table when the boys are back. From their childhood, it has been a firm favourite and whenever placed in front of them, they develop voracious appetites and elicit mmmmm's of contentment whilst devouring.  

I've always been one of those democratic mothers, encouraging foodie requests, but the one dish that they unanimously request time and time again, is the versatile, flavourful and tasty Keema, served with roti. This renowned Indian mince dish originates from the Persian meat stew 'Qeymeh.' In India, it is typically made with goat meat, but lamb or chicken mince work particularly well. The Keema, cooked with onion, garlic, ginger and aromatic spices is enhanced with the addition of peas or potatoes. In our house it has got to be, without a shadow of a doubt, delicate new potatoes that give the keema another dimension, with their soft and fluffy texture, packed with flavour. 

If you are a lover of good Indian food, you will receive plenty of kudos for this homely, feel good and comforting recipe. Serve with the sumac onions, which provide a great umami fix. This simple Keema recipe will be one you come back to time and time again.

Keema with New Potatoes and Sumac Onions

Serves 4-6

  • 1 kg Lamb or Chicken Thigh Mince

  • 2 Large Onions, finely chopped

  • 2 tbsp Sunflower Oil

  • 6 Large Cloves Garlic

  • 7 cm Piece of Ginger, peeled

  • 1 Green Chilli

  • 1 400g Can Chopped Tomatoes

  • 2 tbsp Tomato Puree

  • 2 tsp Salt

  • 2 tsp Garam Masala

  • 1 tsp Coriander Powder

  • 300g New Potatoes, peeled, washed and cut into half

  • Handful of Coriander, finely chopped

Method

  • In a heavy-based pan, heat the sunflower oil on a moderate heat and start frying the onions.

  • Place the 'Holy Trinity' of garlic, ginger and chilli into a herb mill and blitz into a paste. Add this to the frying onions.

  • Once the onions are quite brown, lower the heat slightly and add the chopped tomatoes and the tomato puree and cook with the browned onions for approximately 20 minutes or until the tomato masala sauce is a rich, deep red, thick sauce. At this point you will see the oil emerging from around the rim of the pan. 

  • Add the mince and stir into the onion and tomato masala sauce. 

  • Add the salt, garam masala and coriander powder.

  • Cook for about 40 minutes, stirring regularly, until the Keema is like a thick stew, with none or very little liquid left. The Keema will start to fry in the masala sauce.

  • At this point add the potatoes and stir in. Lower the heat and cook for about 20-30 minutes, or until the potatoes are cooked. During this time, do stir regularly. You may need to add a little water to help cook the potatoes. 

  • Add the coriander leaves and serve with hot roti and sumac onions marinated in salt, lemon juice and sumac. 

Tips

  • If you use chicken mince, do not use breast meat, as this is too dry, instead use skinless, boneless chicken thighs minced up. (My butcher usually does this for me).

  • If you prefer to add peas instead of potatoes, add the peas after the Keema starts to fry and cook for about 5-10 minutes before serving.

Sumac Onions

Sumac is a Middle Eastern spice which has a slightly tart, tangy, lemony flavour. 

  • 1 Red Onion, finely sliced

  • 0.5 tsp Salt

  • 1 tsp Sumac

  • 2 tbsp Lemon Juice

Method

  • Mix all the ingredients together in a bowl, leave to marinate for 30 minutes and serve.

Tips

  • These sumac onions are a great accompaniment to any meat, chicken, fish or vegetable dish and provide a great umami fix.


Berry Delightful

Baking cakes is therapeutic. There's even a theory that baking helps with depression. It certainly lifts your mood to be able to use very simple ingredients and create such glorious concoctions. A great sense of self satisfaction takes over. The whole nation is gripped with the cake revolution. Our very own Mary Berry and Paul Hollywood have made baking very 'cool.' So not only do we feel worthy doing it, but we are being trendy in the process. The Women's Institute owe a huge debt of gratitude to the Great British Bake Off. In fact, it's such an addictive amateur baking talent show, that it doesn't matter if you bake or not, you can't help but get drawn in. We can't wait to tune in for the next episode to witness the journey from tears over treacle tarts, to satisfaction in strudel mastery, to the highest accolade that is the Hollywood handshake. Our cake obsession seems to have been exacerbated by this show and if you didn't before, you probably now suffer from a cupcake OCD! 

There's always been a calling for cake and whether it be times of joy, or times of adversity, cake is always there for us. There's a certain comfort that we derive from baking and despite this previously being reserved for the occasional afternoon tea, cricket tea or Granny's Sunday cake, we are a now an anytime baking nation with astounding skills. There's an abundance of baking clubs, local bake-offs and charity fundraisers hosting coffee and cake mornings. There is this tenacious feel good factor and it's all about the cake. So with all that in mind, delight in my quaint summer berry layer cake with lavender petals. There's no 'soggy bottom' here Mr Hollywood. On your marks, get set, bake!  

Summer Berry Layer Cake with Lavender Petals

Serves 8-10

  • 2 Large Eggs

  • 200g Caster Sugar

  • 125g Butter

  • 150ml Single Cream

  • 175g Plain Flour

  • 3 tsp Baking Powder

  • 200ml Double Cream

  • 1 tbsp Vanilla Caster Sugar

  • 800g Berries (Strawberries, Blueberries, Raspberries)

  • 2 Sprigs Lavender Petals

Method

  • Using 25g of the butter, grease two 22cm shallow cake tins and line with baking parchment.

  • Whisk the eggs with the caster sugar in a bowl, until the mixture is thick and creamy and the whisk leaves a trail.

  • Put the remaining butter with the cream into a pan and bring to the boil.

  • Allow to cool for a couple of minutes and stir into the egg and sugar mixture.

  • Sieve the flour and baking powder and fold it carefully into the egg and sugar mixture making sure that their are no lumps.

  • Divide the mixture between the two cake tins.

  • Bake in the oven (170º celsius fan assisted or equivalent) for 15 minutes or until they are cooked and an inserted skewer comes out clean.

  • Remove the cake tins from the oven.

  • Allow to cool for 5 minutes and then remove the cakes from the tins and cool completely on a wire rack.

  • While the cakes are cooling, whip the double cream with the vanilla sugar until it is lightly whipped.

  • Prepare and clean the fruit and hull the strawberries.

  • Once cooled, place one cake onto a cake serving plate, or a cake stand.

  • Place half of the whipped cream onto the cake and arrange half of the fruit on top.

  • Put the second cake on top and then place the remaining cream on top. Arrange the fruit and finally sprinkle over the petals from the two sprigs of lavender.

Tips

  • I make the vanilla sugar by placing a vanilla pod into a container of caster sugar. 

  • Instead of whipping the cream with vanilla sugar, it can also be whipped up with a tablespoon of lavender sugar.

  • If you don't have any lavender petals you can omit them, or sprinkle over dried rose petals.

  • Don't overdo it with the lavender, as it will start to taste rather soapy.   


Oh I Say

Yay, the heat is on! It's that time of year where I have no qualms about switching on the television during the day, casting aside any work that needs to be done, all in the name of that prestigious lawn tennis tournament that is Wimbledon. This tournament has been a big part of my childhood. From Dan Maskell's velvety voice and his iconic phrase 'Oh I say,' whenever a player produced an outstanding shot, to the traditional eating of strawberries and cream and of course most importantly, the spectacular tennis. Bjorn Borg was my tennis hero and I was lucky enough to witness in person his dominance of the grass courts at Wimbledon, in his legendary semi-final match against Vitas Gerulitis.

Wimbledon has been basking in the heat over the last few days and Pimm's seems to be the order of the day. There is a Punjabi version of a non-alcoholic cooler which is prepared during the sweltering hot days of the Indian summer. An Indian lemonade called Shikanjvi is made using lemons or limes, sugar, black Himalayan salt, (Kala Namak) and roasted cumin powder. This thirst quencher is an acquired taste and there’s also a sweetened version. It's basically the lemon juice that makes the drink so refreshing.

I've concocted a summer cocktail that’s cooling and reinvigorating. So whether you're at Wimbledon, Henley Royal Regatta, Hampton Court Palace Flower Show or the F1 at Silverstone, revel in in these balmy nights, sip slowly and enjoy this delightfully refreshing cocktail.

Lemonade Cucumber Mimosa

Serves 4

  • 1 Large Lemon

  • 4 cm Piece of Cucumber, grated

  • 3 Sprigs of Mint

  • 3 Sprigs of Lemon Verbena

  • 120 ml Water, chilled

  • 2 tbsp Sugar

  • 2 tbsp Water

  • 35 cl Prosecco

  • 4 Long Pieces of Cucumber

Method

  • In a small pan heat up the sugar and water until the sugar has dissolved and the liquid is clear and not grainy. Allow to cool.

  • Squeeze the juice of the lemon and place into a cocktail shaker.

  • Add the cucumber, mint and lemon verbena. Muddle all the ingredients together in the cocktail shaker.

  • Add the chilled water. Put the top onto the cocktail shaker and shake away.

  • Divide the lemon mixture between the 4 Champagne flutes through a small sieve, filling a third of each glass.

  • Top each glass with Prosecco.

  • Concertina each length of cucumber onto a small cocktail stick and place into the glass.

Tips

  • I am a Champagne purist and I don't like to use it for Mimosas and Bellinis, therefore it is better to use a good quality Prosecco.

  • Obviously adjust your quantities according to your needs.

  • If you don't have any lemon verbena, just use mint, although I grow both in pots in the garden and it's easy enough to grow. It can also be used in Pimm's.

  • This Mimosa also makes a great brunch drink.

Queen of Dals

My memories of homemade hot buttery black lentils cooked in a delicious, mildly spicy sauce tantalises my tastebuds to this day. There was nothing more comforting than to come home from school to the warmth of my mother’s kitchen and the aroma of dal and roti. My favourite of all the dals was by far and still is the Punjabi iconic 'Maa ki Dal,' or now more commonly known as 'Dal Makhani.' These black urad lentils are cooked with rajma (red kidney beans) and spices for hours over a low fire and just before serving, the dal is tempered with some butter and spice, and a splash of cream is drizzled in just before the coronation. Once the cream is added, this lentil has its status elevated from humble to regal and now has the grand title of 'Dal Maharani,' the Queen of Dals. This was a staple in our Punjabi home and is ubiquitous at any lavish dinner party or wedding. It's a luxurious, rich, robust meat substitute for all the vegetarians. 

Dal Makhani as we know it today was put onto a pedestal by the famous Delhi restaurant Moti Mahal. They were looking for a vegetarian equivalent to their famous creation, 'Chicken Makhani.' They added their eminent makhani sauce, which included tomatoes and cream, to the lentils and there the modern day 'Dal Makhani' was born. The most celebrated place to eat this, is at Bukhara in New Delhi. 'Dal Bukhara' is cooked from the finest urad lentils, sourced from only the best; mineral water is used to cook the dal and the chefs cook it on a low flame overnight, with the cooking continuing for a further 18 hours. Rest assured it isn't necessary to cook it for that long in order to create the creamy, silky, moreish dal. I urge you to cook and savour this quintessential lentil recipe. You'll definitely be back for seconds!

Dal Makhani

Serves 6

  • 225g Whole Black Urad Dal

  • 115g Rajma (Red Kidney Beans)

  • 1 Large Onion, finely chopped

  • 2 tbsp Sunflower Oil

  • 7 cm Piece of Ginger Root, peeled

  • 3 Large cloves Garlic

  • 1 Green Chilli

  • 1 dessertspoon Tomato Puree

  • 2 tsp Salt

  • 2 tsp Garam Masala

  • 1 tsp Coriander Powder

  • 100 ml Double Cream

  • 1 tbsp Coriander, finely chopped (optional)

Method

  • Soak the dal and rajma together in a large pan overnight, making sure that water is filled to the top of the pan.

  • The following day drain the lentils and rajma in a colander and wash well under cold running water.

  • Put the lentils and rajma into a pressure cooker and add a full kettle of boiled water. The heat on your hob should be maximum at this point. Put the lid onto the pressure cooker and after the build up of the pressure, reduce the heat to a moderate level and cook for a further 20 minutes. (Each pressure cooker is different and it is important to follow manufacturer's instructions. If you don't have a pressure cooker, boil the dal and rajma in a pan until it is soft when you squeeze a kidney bean between your thumb and forefinger. Just ensure that the water remains topped up whilst boiling).

  • Take off the heat and allow the pressure to dissipate.

  • Take the lid off the pressure cooker and add enough boiled water to cover the dal. Stir in the salt, garam masala, coriander powder. At this point it should resemble a thick stew. Add a little more boiled water if necessary and cook on a very low heat.

  • In a separate frying pan add the sunflower oil, heat on a moderate flame and add the onions.

  • In a herb mill grind the ginger, garlic and chilli together and add to the frying onions.

  • Once the onion mixture is golden brown, add the tomato puree and stir in. Cook for a further 3-4 minutes and then add into the simmering pot of dal.

  • Cook the dal for approximately an hour, stirring regularly. 

  • Add some boiled water if the dal is looking too thick and gloopy. Whilst cooking slowly the water does continue to evaporate slowly, so its fine to add a little water to loosen it.

  • It should resemble a thick stew once cooked.

  • Before serving add the cream and stir in, saving a little to embellish the dal in the serving bowl.

  • Sprinkle chopped coriander on top if you wish, but this is optional.

  • Serve with hot rotis, naans or basmati rice.

Tips

  • I often cook double the quantity and freeze half of it into tupperware containers. When I want to use it, I just defrost, warm it up in the pan and loosen with some boiled water, as the dal becomes quite thick when it cools down. Fry an onion in a little butter and add to the dal as it is warming up.

  • I only add the cream if I'm serving it to guests, or its a special occasion.

  • To make coriander powder, I just buy the coriander seeds and grind them in a coffee grinder. The flavour is far more intense than the shop bought version.

  • I suggest that the dal simmers for about an hour. This is an approximation. You can do it for 30 minutes if you don't have the time or 2 hours if you do. The longer it cooks, the better it tastes!

One for Dad

For the last few days Dad has been nibbling on chocolate, the 85% cocoa variety. He's been quite excited after reading about the health benefits of chocolate recently published in the BMJ journal, Heart. A trial conducted over several years has concluded that people who regularly eat chocolate are less likely to develop strokes and cardiovascular disease, compared to those who don't eat any chocolate. This is a trial that I would have happily participated in, and sacrificed my body in the name of medical science! It is apparently all to do with the bioactive plant compounds found in cocoa beans. The researchers have found that by eating a daily dose of 100 grams, the risk of heart disease is reduced by 14 per cent and a 23 per cent reduction in the risk of a stroke. Other studies have also shown that eating chocolate lowers the 'bad cholesterol' in the body and another advocates that chocolate can help prevent memory decline. So now we don't need an excuse to eat chocolate; it’s all in the name of good health! 

Speaking of good health, where is George Clooney, our favourite ER doctor? Evidently, he's busy enjoying another one of life's great pleasures, coffee! Nespresso has revolutionised my life. No longer do I crave a designer coffee. My swanky machine awaits me each morning and once my pod is in at the touch of a button, my perfect luxury coffee is born and boy does it deliver. So the smart 'suits' at Nestlé have tapped into a lifestyle brand and I admittedly have fallen for it, hook line and sinker!

Using these two incredible ingredients, chocolate and coffee, with an added tipple of Tia Maria coffee liqueur, I've decided to treat Dad to a delectable dessert for Father's Day.

Happy Father's Day Dad!

Tiramisu

Serves 4-6

  • 250g Tub Mascarpone, full fat

  • 3 Egg Yolks, large, free range

  • 2 Egg Whites, large, free range

  • 50g Caster Sugar

  • 160ml Intense Espresso

  • 2 tbsp Tia Maria

  • 12 Sponge Fingers (Savoiardi)

  • 50g Dark Chocolate, 70% cocoa, finely chopped 

  • 2 tsp Cocoa Powder

Method

  • Place the egg yolks and caster sugar into a large mixing bowl and beat. (I use an electric hand whisk). Beat together until it looks very pale and thick. This usually takes a couple of minutes.

  • Add the mascarpone into the pale egg and sugar mixture. Beat on a slow speed. Initially it will look curdled, but keep beating until it is incorporated and smooth.

  • Place the egg whites into a medium bowl and whisk with clean beaters, until the egg white forms stiff peaks.

  • Gently fold the egg white into the mascarpone mixture and then set aside.

  • Put the espresso and Tia Maria together into a mug.

  • In a medium-sized glass serving bowl, place half of the sponge fingers at the bottom and spoon over half of the coffee mixture onto the sponge fingers.

  • Cover the sponge fingers with half of the mascarpone mixture and top that with half of the chocolate.

  • Repeat this whole process, layering the sponge fingers and spooning the remaining coffee mixture onto them. Cover with the remaining mascarpone mixture and sprinkle the remaining chopped chocolate on top. Sift the cocoa powder all over.

  • Place the dessert into the fridge for several hours until the dessert is set and chilled. It is better to leave it overnight if you can.

  • Serve the dessert straight from the fridge.

Tips

  • Make sure you use very good quality free range eggs.

  • I chop the chocolate in my food processor to minimise handling.

  • I make the espresso in my Nespresso machine using the Indriya capsule. This is an intense coffee with spicy notes, from India.

  • If I make this dessert for a dinner party, I just double all the ingredients and serve it in a large glass bowl for everyone to help themselves.

  • You can also make individual ones, in small glass bowls, or in large martini glasses.

Time to Detox?

The term 'detox' is being bandied around rather a lot these days. We are told that we need to detox physically, mentally and emotionally. This colloquialism refers to healthy eating, healthy living and mental health. We are lured into a world of smoothies bursting with greens, spiralized vegetables hoodwinking us into thinking we are eating pasta, super finely grated vegetables impersonating rice; and salads loaded with micro leaves, sprouted beans, seeds and nuts. Does all this healthy eating cleanse our chocolate binging, our overt weekend wine quaffing or our post-drinking craving for greasy foods?

Admittedly, I've been quite cynical about all the detox hype, despite the fact I'm all for nutritious, healthy eating. Freshly pressed vegetable juices are a great boost to our immune systems and fresh leafy green cruciferous salads are full of antioxidants. The star of the show at the moment is kale, it's the trending superfood vegetable of the season. From Beyonce's kale t-shirt to Gwyneth Paltrow advocating kale chips, kale it seems is here to stay. It has made an appearance in every supermarket and curly kale is King. With its anti-cancerous properties and with enormous amounts of iron and calcium, it's definitely the super model on the catwalk of vegetables and it's strutting its stuff!

So in honour of the mighty kale, I've decided to jump on the bandwagon and I've created my very own detox kale salad. 

Detox kale salad

Serves 4-6

  • 200g Kale, very finely shredded or grated with the stalks removed

  • 300g Red Cabbage, shredded or finely grated

  • 2 Carrots, shredded or finely grated

  • 2 Tomatoes, chopped into small dice

  • 1 Red Pepper, chopped into small dice

  • 2 Ripe Avocados, peeled and chopped

  • 110g Paneer, chopped into small cubes (Optional)

  • 1 400g Tin Kala Channa (Dark Brown Chickpeas), drained and rinsed 

  • 1 Lemon

  • 1 Lime

  • 50g Coriander, finely chopped

  • 1 teaspoon salt

  • 1 Green Chilli, finely chopped

  • 1 Handful of Pine Nuts

Method

  • Place the very finely chopped kale into a large bowl.

  • Add the red cabbage, carrots, tomatoes, red pepper, avocados, paneer, chickpeas, pine nuts and the coriander. 

  • Mix everything together and add the juice of the lemon and the lime.

  • Add the salt and the green chilli and mix well into the salad.

  • Allow the salad to rest in the fridge for at least thirty minutes, allowing the flavours to develop and the citrus to work its magic on the kale before serving.

Tips

  • You can toast the pine nuts in a dry frypan on a low to medium heat for a couple of minutes. Just keep an eye on them as they burn very quickly.

  • I sometimes chop up leftover homemade polenta into cubes and shallow fry until crispy. Sprinkle over the salad just before serving.

  • Tins of kala channa (dark brown chickpeas) are available from some supermarkets, however if you can't get these, just use a tin of the regular chickpeas. The kala channa has a much nuttier flavour than regular chickpeas.

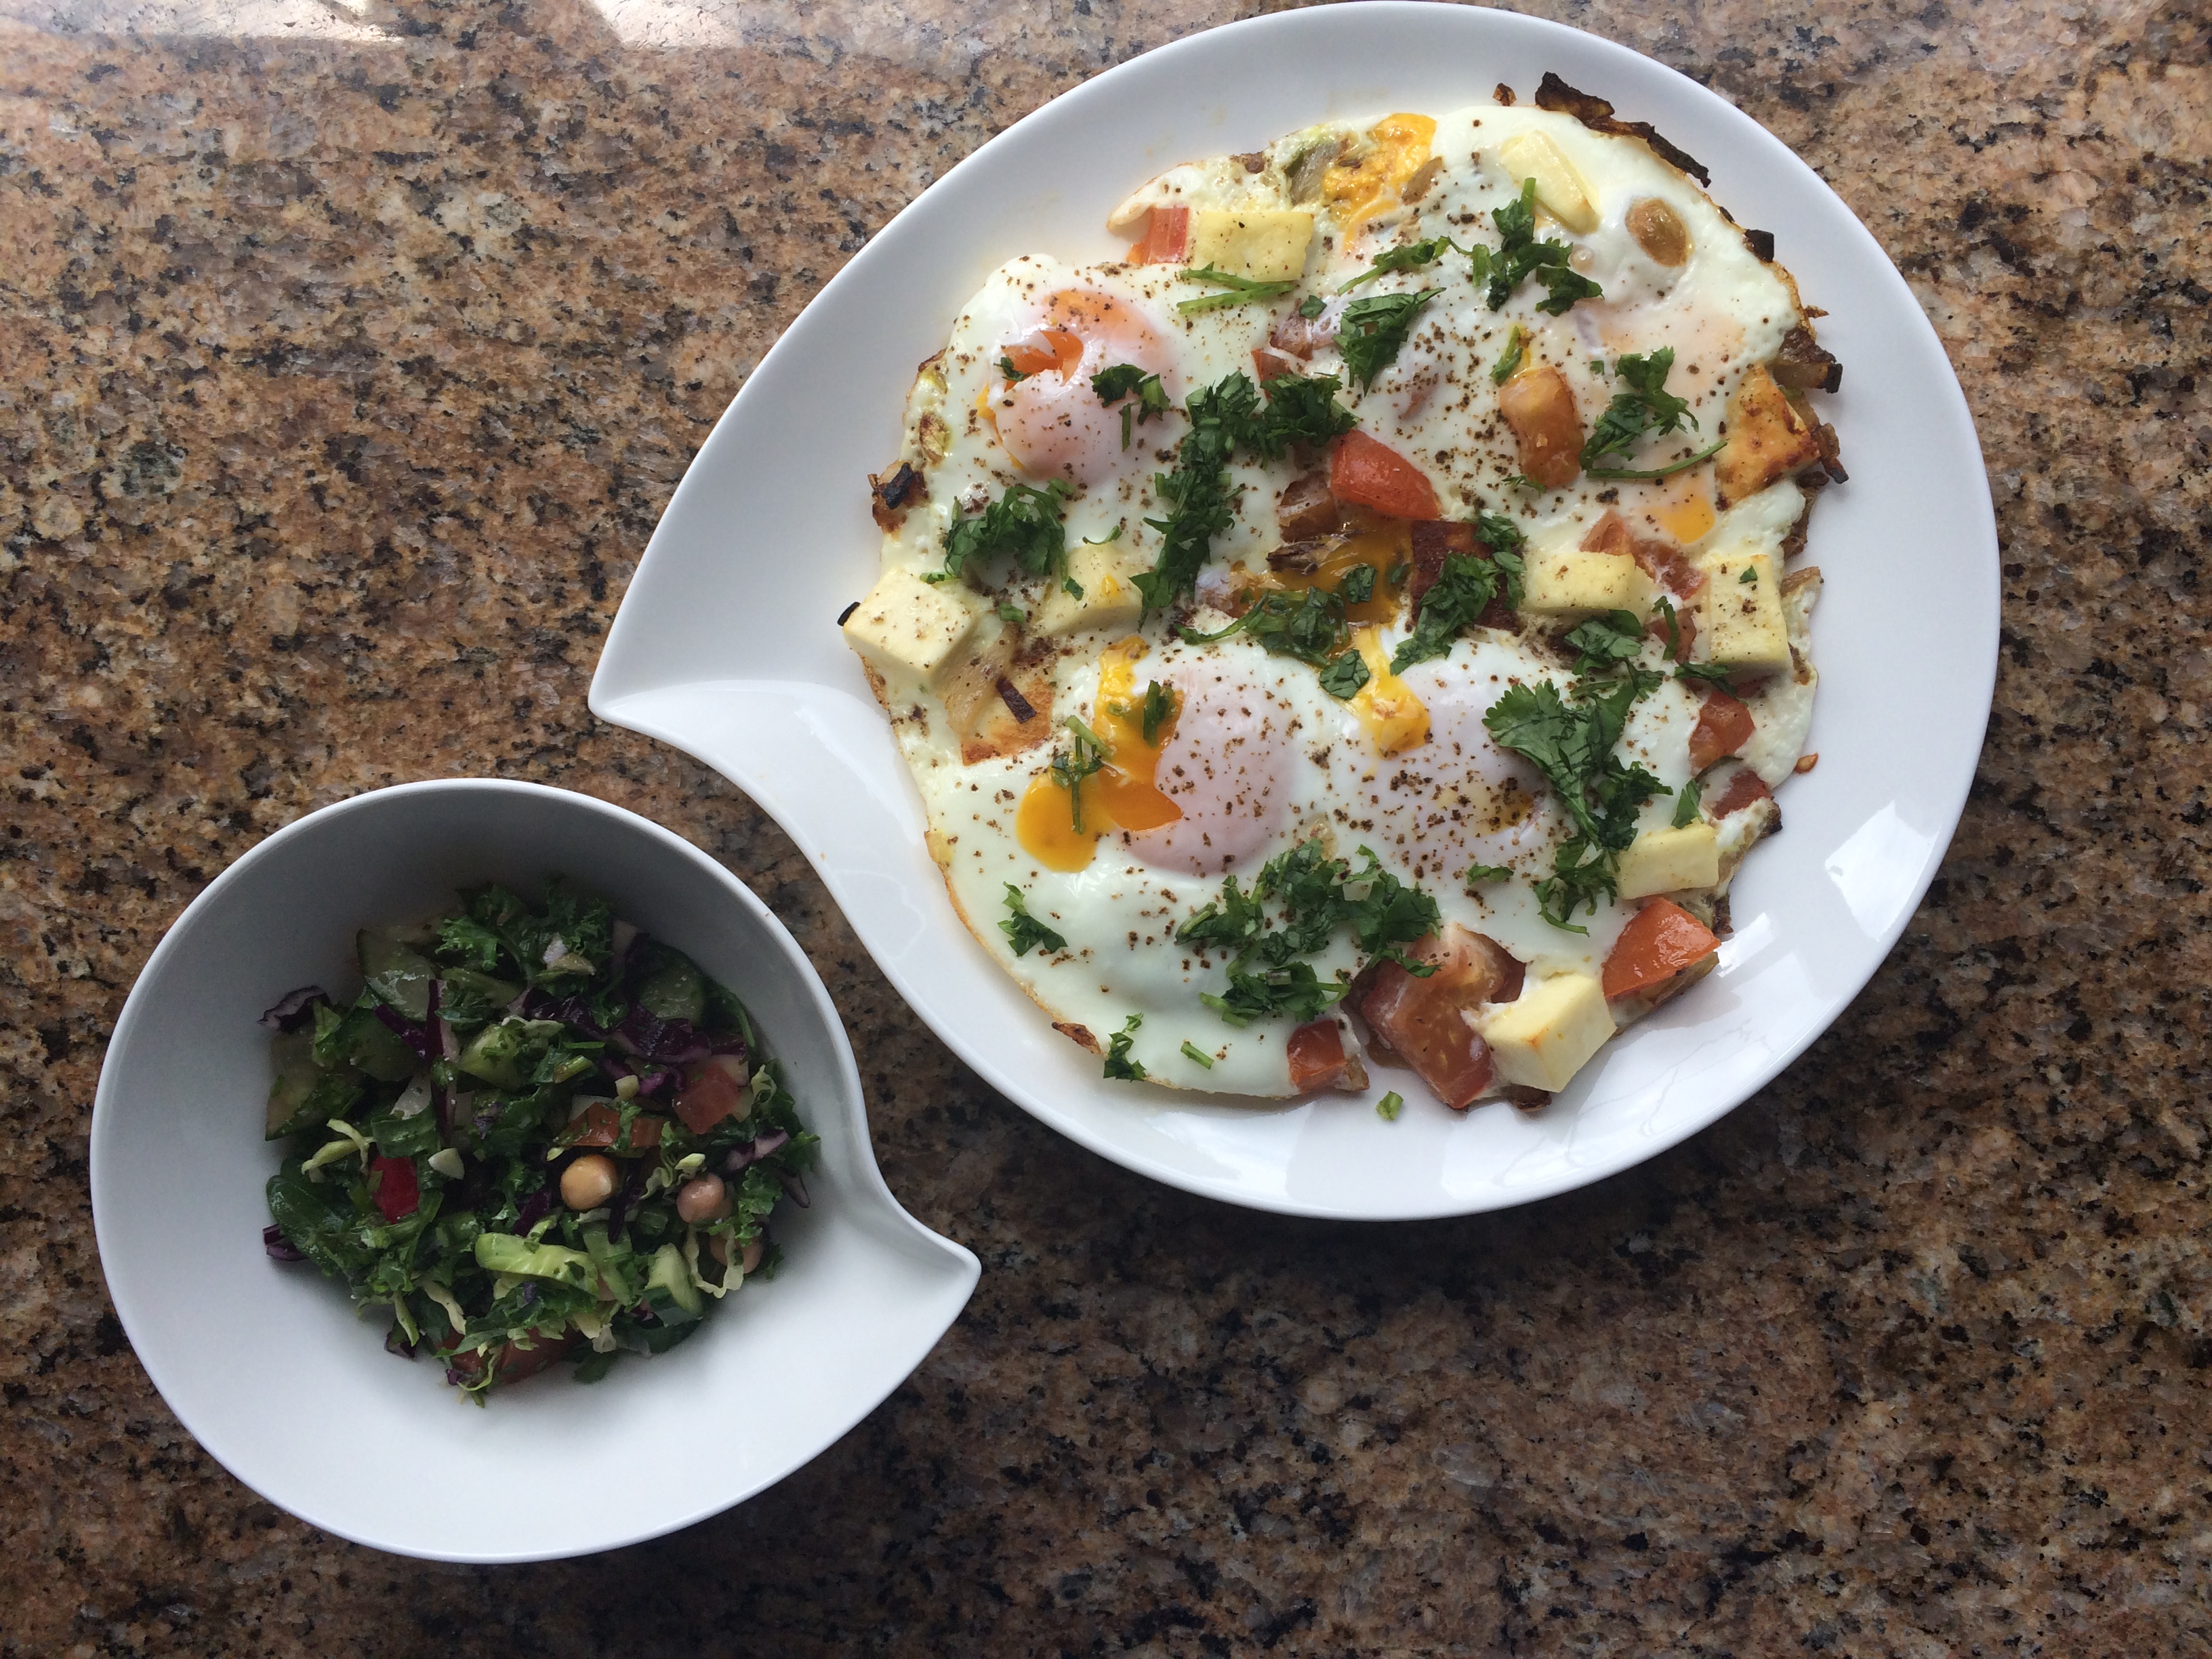
  • This salad is also the perfect accompaniment to my brunch dish, Indian Eggs with Tomatoes and Paneer.

Afternoon Chai

Henry James famously wrote in The Portrait of a Lady, 'There are few hours in life more agreeable than the hour dedicated to the ceremony known as afternoon tea.' Afternoon tea it can be said, is a quintessentially British tradition, an institution in fact. It was originally meant as a stopgap for the Duchess of Bedford to deal with afternoon hunger pangs between her two meals. However, afternoon tea is more fashionable than ever and no visit to Britain is complete without experiencing this custom. Fortnum and Mason, The Ritz, Claridges and The Goring, all pride themselves at being aficionados in tea-drinking and in the artistry of tiered plate presentation. In fact these chefs are becoming more and more creative with themes being added for Mother's Day, The Chelsea Flower Show and Wimbledon. Afternoon tea is all about relaxing over a pot of tea, (despite having at least fifteen different varieties to choose from), alongside a variety of sandwiches, scones, pastries and cakes. There is actually more than that to think about and there are several ongoing debates. Does the milk go into the cup before or after the tea; and which goes onto the scone first, the cream or the jam? All this etiquette should not get in the way of enjoying the indulgence of this time-honoured tradition.

An Indian 'High Tea' is not just cardamom chai with a couple of biscuits thrown in. It is usually a lavish spread of finger foods. The obligatory sandwiches, scones and cakes do get a look in, but bite size samosas, paneer pakoras, chaats, aloo tikkis and sweet barfis embellish the whole spread. I have wonderful childhood memories of savouring afternoon tea in Mumbai at that iconic, majestic landmark that is the Taj Mahal Palace Hotel. Overlooking the Gateway of India and the Arabian Sea, the Sea Lounge, with all its colonial charm was and still is the most serene place to not only enjoy afternoon tea but to view the ferries bobbing up and down on the sea, travelling to and from Elephanta Island. The extensive food delicacies certainly enhanced my experience and to this day whenever I'm in Mumbai, I can't leave without revelling in tea drinking at the Sea Lounge.      

I recently hosted afternoon tea for friends and family and I did indulge my guests in a variety of sweet and savoury fare. The sumptuous cakes, macarons and bite sized pastries produced squeals of delight, and to cut through the richness of the savouries, I served platters of exotic fresh fruit, a little something to minimise the guilt of too much excess! Afternoon tea maybe trendy, but it's dignified and elegant too, so go forth and enjoy your high chai.

A Right Royal Dish

Whenever my children return home for the weekend, they want nothing more than the fridge stuffed to the brim, chilled wine and food on tap to satisfy their discerning palates. There's a host of their favourites on their 'comfort food list,' so it's all about how much I want to indulge them. My chicken shahi korma certainly hits the spot. With its roots in Mughal royalty, the mild korma is cooked using yoghurt, almonds, cream and aromatic spices to create a delicate but rich tasting dish. 'Welcome home guys.'

Chicken Shahi Korma

Serves 4

  • 1 kg chicken thighs, skinless and boneless with all fat removed, each thigh chopped into 4 pieces

  • 5 Large Cloves of Garlic

  • 5 cm Piece of Ginger, peeled

  • 1 Green Chilli

  • 4 tbsp Oil

  • 2 Large Onions, finely chopped

  • 250g Natural Greek Full Fat Yoghurt

  • 2 tsp Salt

  • 2 tsp Garam Masala 

  • 1 tsp Coriander Powder

  • 2 tbsp Ground Almonds

  • 1 tbsp Flaked Almonds

  • 150ml Double Cream

  • 30g Coriander, finely chopped

Method

  • Grind the garlic, ginger and chilli in a herb mill to form a paste.

  • Heat the oil in a pan adding the onions and the garlic, ginger, chilli paste.

  • Fry on a moderate heat until the onions are golden brown and add the yoghurt and ground almonds, stirring for a couple of minutes.

  • Add the chicken, salt, garam masala, coriander powder, flaked almonds and mix well.

  • On a low to medium heat, cook for about 40-45 minutes until the chicken is well cooked and the gravy is a darker shade of brown and has thickened.

  • Add the cream and stir in. 

  • Heat through, stir in the coriander and serve with hot Basmati rice or Indian bread, such as Chapatti or Naan.

Tips

  • If you make your own homemade garam masala you will find that the shahi korma is far more aromatic and the spices have more depth to them. I will post my garam masala recipe for you very shortly.

Breakfast for Dinner

I'm a breakfast kinda gal, so breakfast, brunch or brinner, it all works for me. Sunday Brunch is a firm favourite in our household, whether it be Cecconi's in LA, Balthazar in New York, The Delaunay in London, or our local vintage tea shop, which does a mean eggs benedict. Sundays are for Mimosas, Bloody Marys, Espressos, Macchiatos and some hearty food followed by sport; whether it be football, cricket, tennis, F1 or golf. You've certainly hit the jackpot if you can watch all of the above on the same day. 

Brunch is really a feast of any-which-way eggs, pancakes, French toast and an array of fruit-inspired treats. An Indian brunch however, conjures up images of paranthas, dosas, idllis, or poha. All carb-laden, but extremely delish, yummy and definitely moreish. Enjoy my Indian eggs with my refreshing Strawberry Lassi, a slightly sweet, fruity, yoghurt-based drink.

Indian Eggs with Tomatoes and Paneer

Serves 2

  • 4 Eggs, free range

  • 100g Paneer, chopped into small cubes

  • 1 Small Onion, finely chopped

  • 1 Tomato, finely chopped 

  • 1 Green Chilli, finely chopped

  • 1 tbsp Coriander, finely chopped

  • 2 tsp sunflower oil

  • Salt to taste

  • Pepper, freshly ground

Method

  • In a medium frying pan heat the oil and add the chopped onions and chopped chilli. Fry on a moderate heat, until the onions are golden brown.

  • Add the chopped tomatoes and the paneer and fry for a further minute. The paneer will start to brown a little.

  • Crack the four eggs into the pan being careful not to break the yolks. Cook for about 3 minutes or until the egg whites are set. Place in a pre-heated moderate oven for 3-4 minutes. 

  • Grind some rock salt and some freshly ground pepper over the eggs.

  • Sprinkle the eggs with the chopped coriander.

  • Place the eggs onto a plate. The yolks should still be slightly runny.

Photo 05-06-2015 14 10 49.jpg

Tips

  • As an alternative, you can beat the eggs, to make scrambled eggs. Add the beaten egg to the onion, tomato, paneer mixture and stir on a low to medium heat and then serve.

  • Enjoy the eggs with my detox kale salad.


Strawberry Lassi

Serves 4

  • 250g Greek fat free Yoghurt

  • 250g Strawberries, hulled

  • 500ml Water

  • 2 tbsp sugar to taste or equivalent 

  • 6 ice cubes

Method

  • Use a blender to blend all the ingredients together. Make sure that your blender has the capacity to crush ice, otherwise leave this out and add ice cubes into each glass after blending.

Tips

  • Use any variation of fruit that you enjoy, or leave it au naturel.

  • Mango, strawberry and banana are firm favourites in our house. 


Bombay Street Food

The distinctive street food of Mumbai is renowned throughout India. As a child visiting what I affectionately call Bombay, I was prohibited from eating any actual street food, as my parents never thought that my constitution was strong enough for the 'Real McCoy' and I was only permitted the feigned 'luxury hotel' version. Although, when spending a year in this flamboyant city in my late teens, I experienced everything from dosa, to papri chaat, to bhel puri to pau bhaji, to pani puri to ragda patties, and the list just goes on and on. 

Chaat and its combination of savoury, crispy papri with cool spicy yoghurt, tangy tamarind, soft potatoes, chickpeas and crunchy sev creates the most magical flavour explosion. I have made a quick & easy chaat appetiser to accompany drinks; just great for when friends just pop over. 

Chaat Cups

Serves 4

  • 24 Croustades or Canapé Cups (these are available from the supermarket)

  • 2 Medium Potatoes, boiled, peeled and finely chopped

  • 1 Tin of Chickpeas, drained and washed well under cold water

  • Salt

  • 225g Natural Yoghurt

  • Chaat Masala (available from Asian Grocers)

  • Tamarind Sauce (available from Asian Grocers)

  • 50g Sev (crispy gram flour noodles available in packets from Asian Grocers)

Method

  • Cover a baking tray with baking parchment and place the canapé cups onto the tray.

  • Bake at 160ºC for 3 minutes to crisp up. (Keep an eye on them and put a timer on, they burn very easily!)

  • Allow to cool.

  • Place the chick peas into a bowl and mash half of them with a fork, leaving the rest whole or partially whole.

  • Add the potatoes to the chickpeas and mix well adding salt to taste. (I usually add about half a teaspoon).

  • In a separate bowl add the yoghurt and mix in 1 dessertspoon of chaat masala.

  • Take a canapé case and fill it with the potato & chickpea mixture, top with a teaspoon of the spicy yoghurt and then put half a teaspoon of the tamarind sauce on top of that. Sprinkle the canapé case with the crunchy gram flour sev noodles.

  • Repeat with all the canapé cases and arrange on a platter and serve immediately.

Tips

  • If you have any leftover ingredients, layer them in individual bowls in the order that I've described and devour!

  • If you want to make this chaat in a bowl, you can make the papri or just buy it from the Asian Grocers as a substitute for the canapé cups and place those at the bottom of the bowl and then layer the other ingredients as described above. Everyone can just help themselves. 

  • Tamarind or Imli chutney (also know as 'Saunth') can be made using a block of tightly packed seedless tamarind which is soaked and blended with added salt, sugar, red chilli powder, ground coriander and ground cumin.

  • I would recommend you enjoy these with the Pomegranate & Orange Martini!